💬 Wechat MP Account
- Register a new Wechat MP
- Get the MP APP ID and APP Secret
- Add a team member
- Fill in MP basic information
- Select MP categories
- MP Account Verification
- File for ICP
- Set up Customer Service Chat
- Link Official Account
💾 Database
- What is BaaS?
- Setup a MINAPP CLOUD account
- Link your MINAPP account to your Wechat MP
- Create a new database table
- Connect your database to your project
🎨 Customization
- Theme and CSS Setup
- Create new pages
- Add new components
💳 Wechat Payment
- Setup a Wechat Pay account
- Connect your Wechat Pay to your MP
- Connect your Wechat Pay to your MINAPP account
🔄 Publishing
- When to publish your MP
- Push your code to Tencent
- Test your MP's beta version
- Publish your MP to Tencent
📚 Resources
- Learning Plans
- Tutorials
- FAQ
Quick Start
Prerequisites
- Node.js (v18.17.1 or higher)
- Yarn (v4.5.0 or higher)
- Git (v2.40.0 or higher)
If you don't have these installed, you can install them by following some tutorials here.
Get your code template
1. Choose your Turbine code template
Select a Turbine package that best suits your project: view pricing here.
Once you've successfully purchased a package, you'll receive an email with an invitation to join the repository. After accepting the invitation, you'll be able to view the code and clone the repository.
2. Clone the repository
Go to the GitHub repository (link in the email) and clone the project.
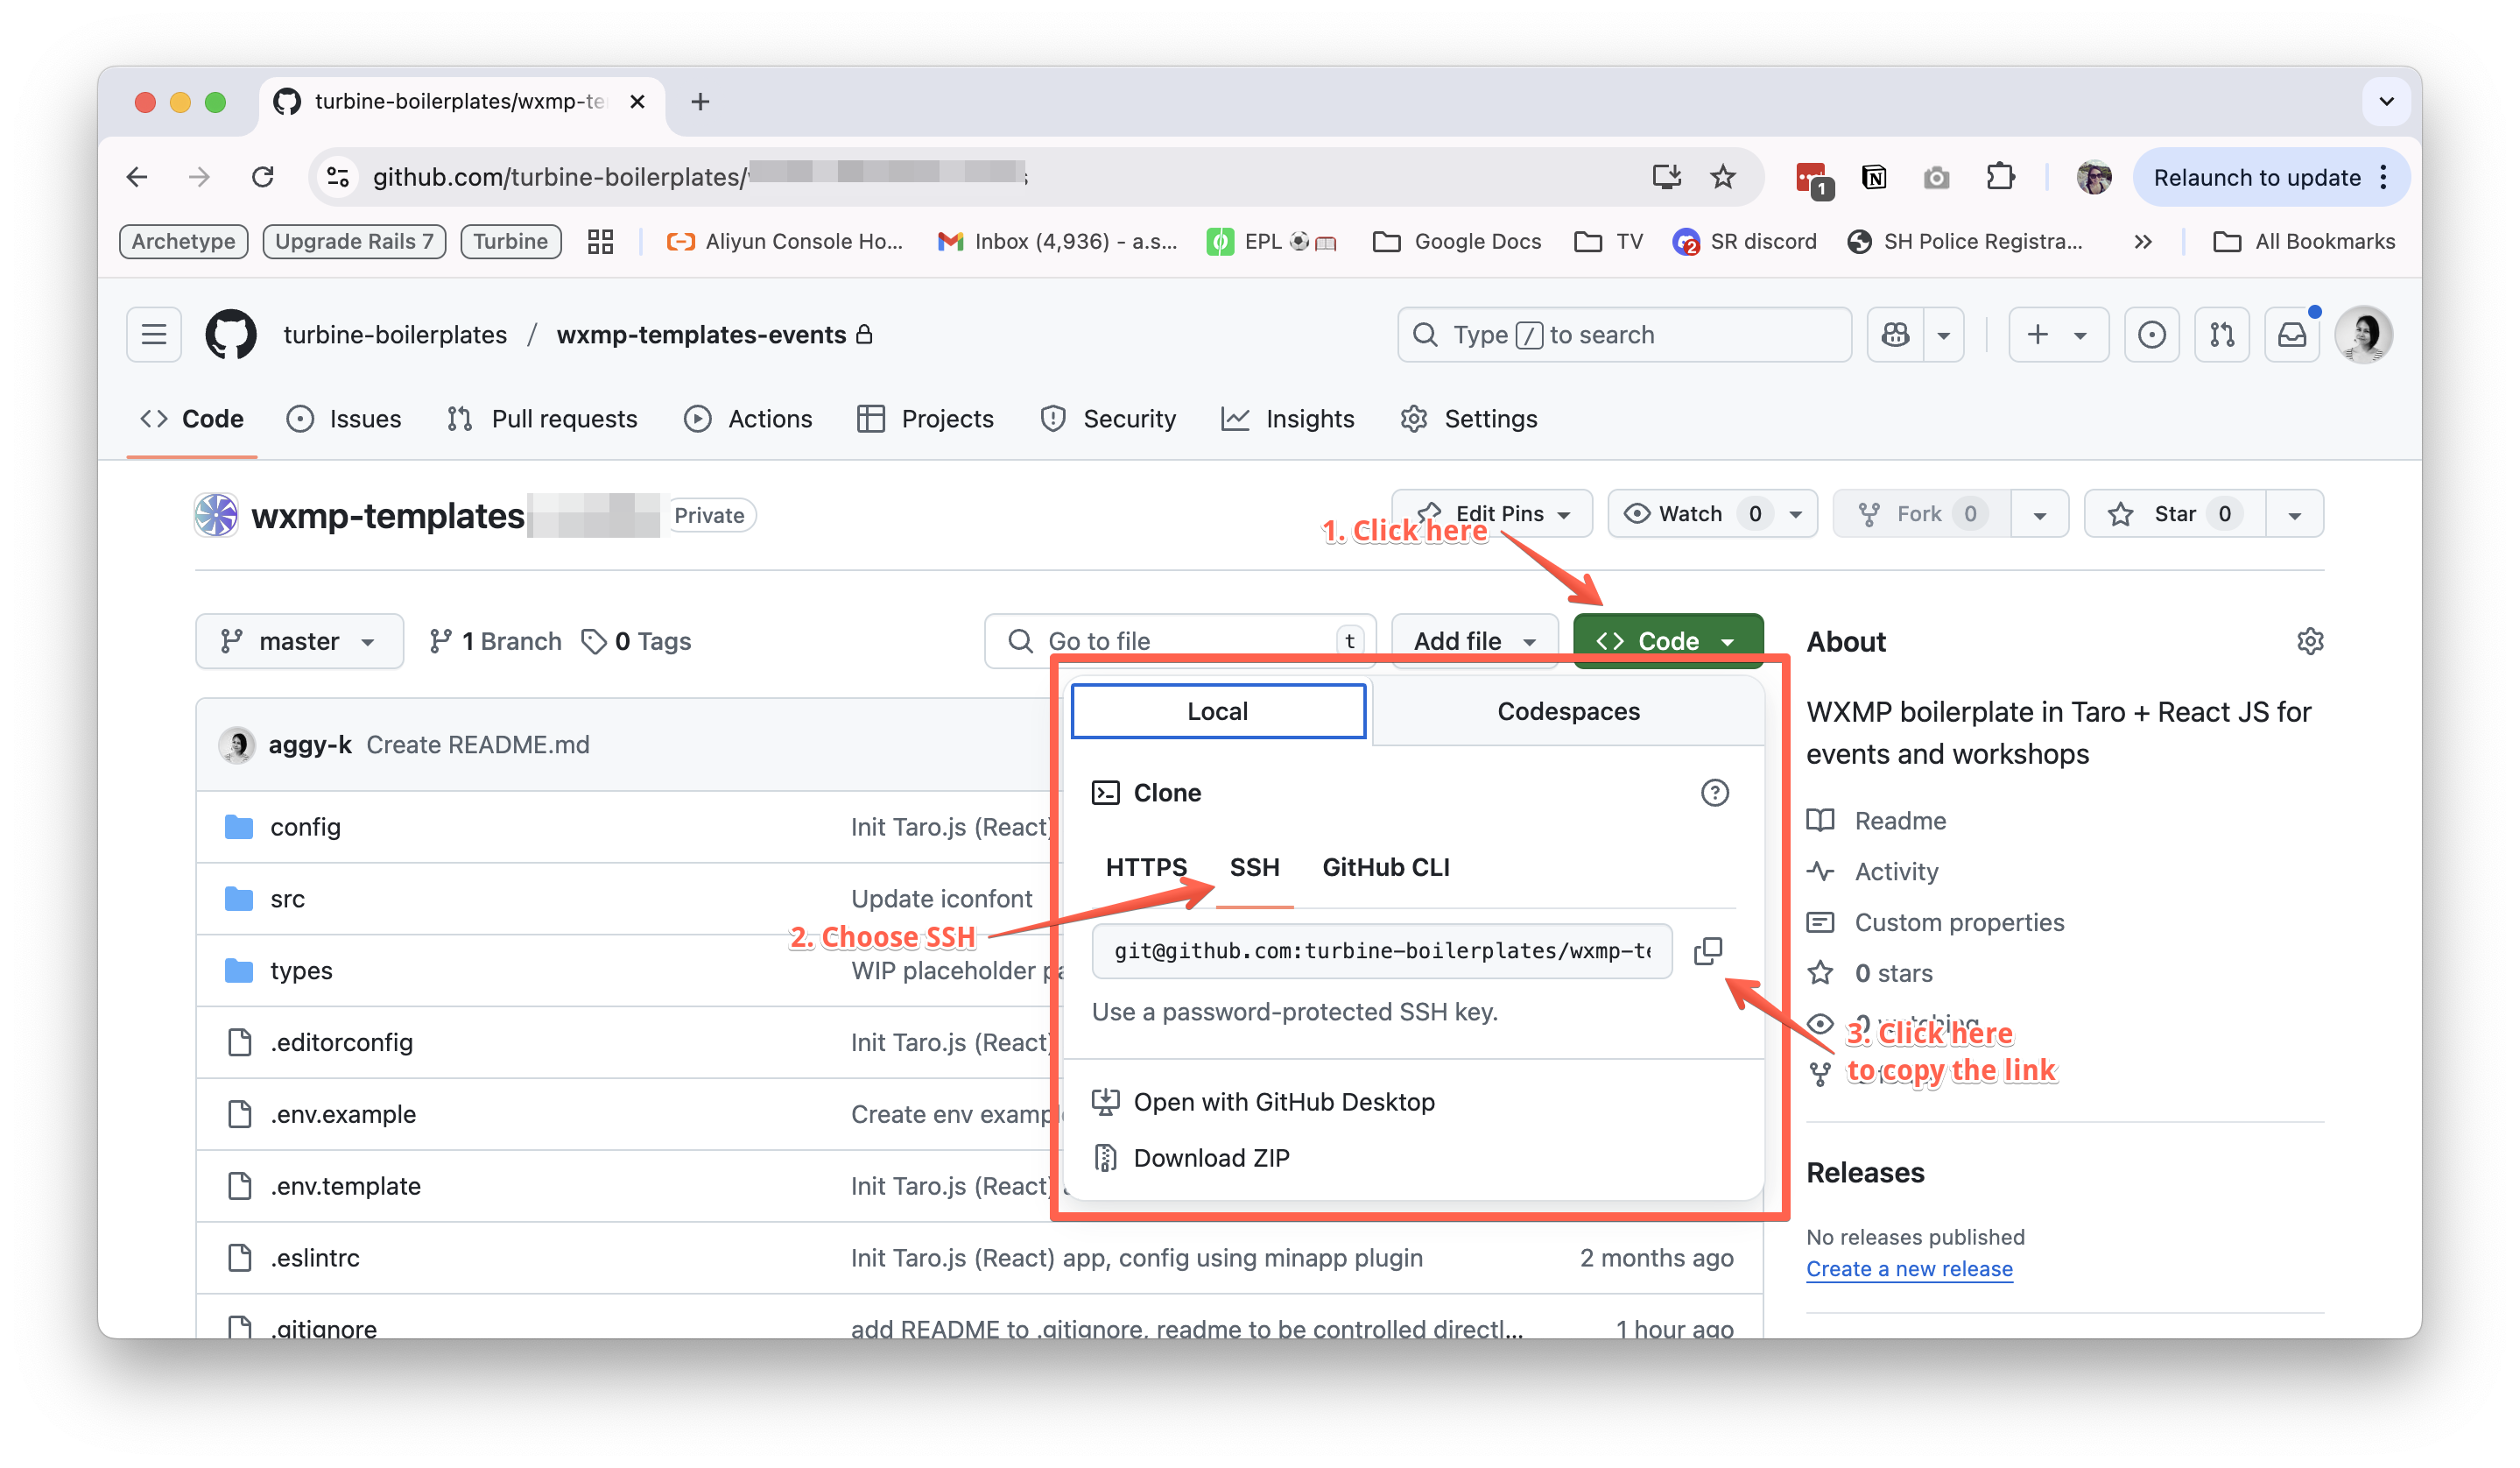
Open your terminal and run the following command to clone the repository.
# Clone the repository, this will create a new directory called my-turbine-mp
# Replace 'git@github.com:turbine-boilerplates/<boilerplate-name>.git' with the link you copied from the Github Repo
# You can replace my-turbine-mp with any name you want for your project
git clone git@github.com:turbine-boilerplates/<boilerplate-name>.git my-turbine-mp

# Navigate to the directory
cd my-turbine-mp
Install dependencies
Run the following command on your terminal to install the dependencies. (You can choose to install dependencies using yarn, npm or pnpm. This is just a matter of preference.)
yarn install
Configure the project
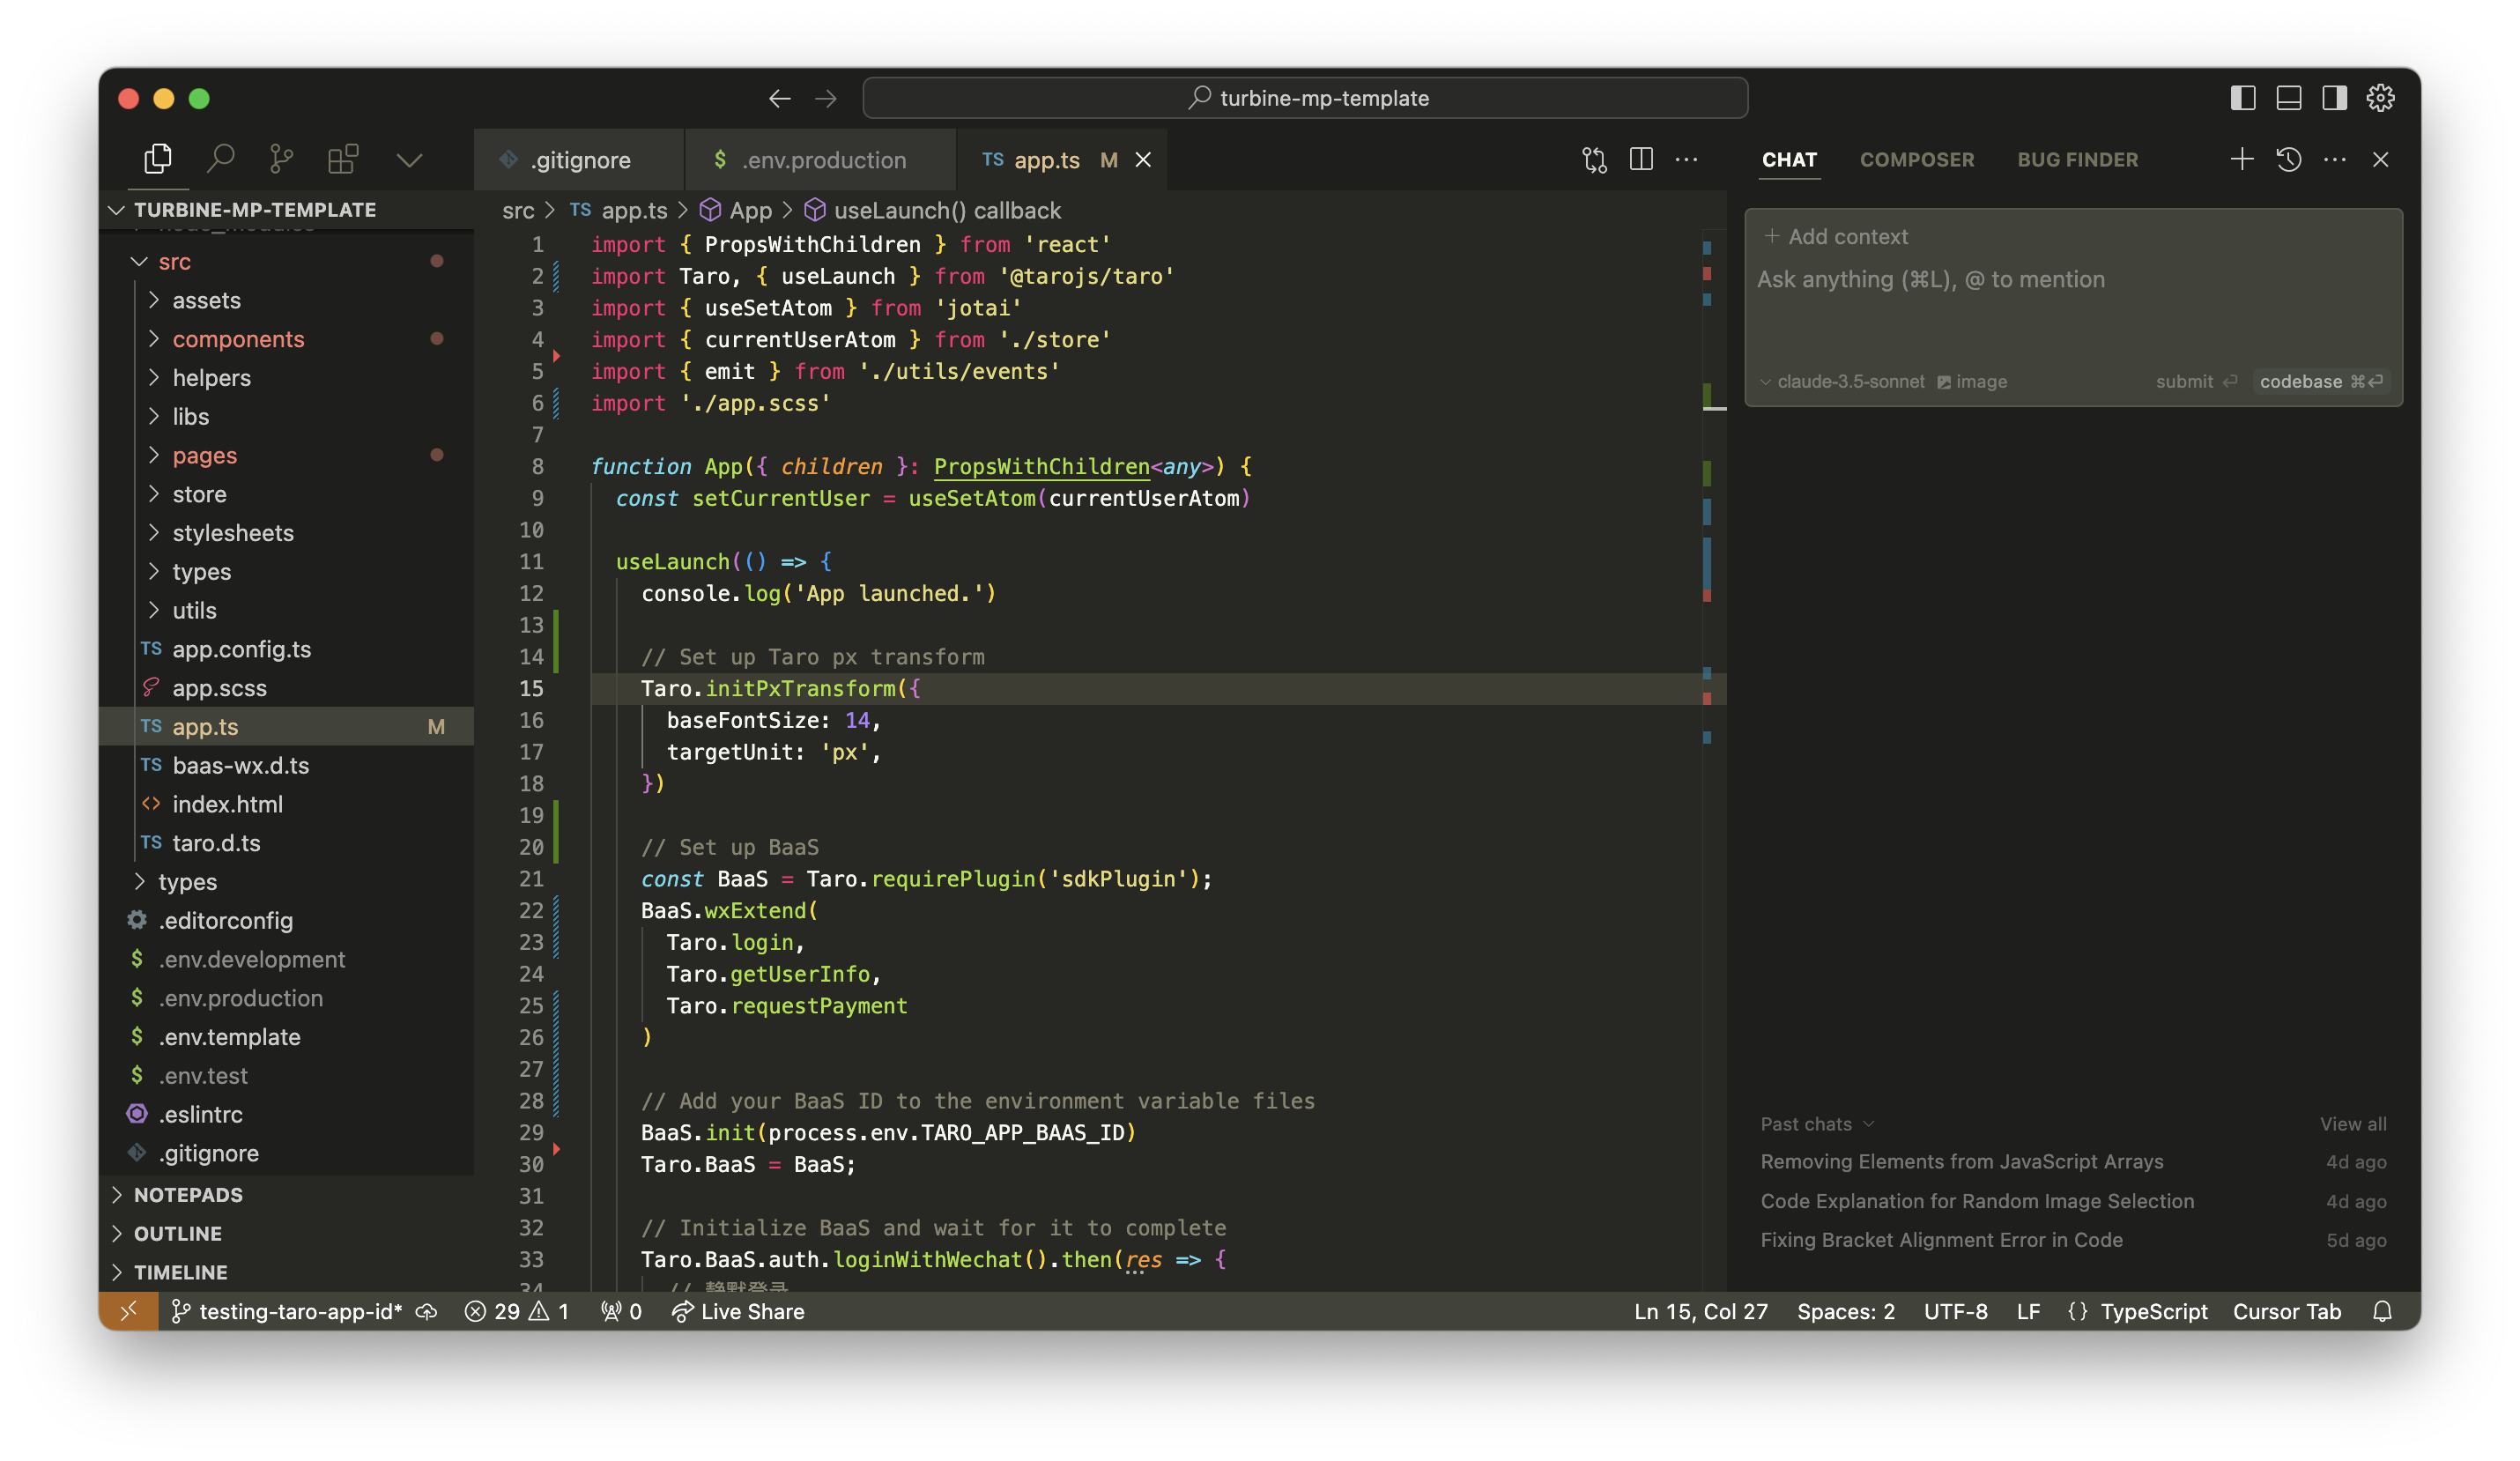
1. Open your code editor
Open the project in your code editor of choice.
# Open the project in your code editor (Cursor, VSCode, etc.)
cursor .
There are many code editors available, such as Cursor, VSCode, Sublime Text, etc. We personally recommend using Cursor as it is a very powerful AI-assisted code editor that can help you write code faster and more efficiently.
2. Set up .env files
.env files are used to store the environment variables for your project. These files are usually not included in the repository, because they contain sensitive information such as API keys and secrets.
In Turbine project, you can find .env.example file in the root directory. This file gives you an example of the information you need to store in order to run the project correctly.
# .env.example
TARO_APP_ID=fill_in_with_your_app_id
TARO_APP_BAAS_ID=fill_in_with_your_baas_id
Copy the content of .env.example file and paste it into both your .env.development and .env.production files.
# In your terminal, run the following command to copy the content of .env.example file
cp .env.example .env.development
cp .env.example .env.production
TARO_APP_ID is the Wechat Mini Program ID.
If you don't have one, you can create one by following the steps here.
If you have registered for an account, you can sign in to the Wechat Mini Program console and find your APP ID in the 设置 > 基本设置 > 账号信息 section. See here for more details.
TARO_APP_BAAS_ID is your Baas ID. BaaS (Backend as a Service) is a service that provides a backend infrastructure and database for your Wechat Mini Program. Read more about Baas here.
If you don't have one, you can create one by following the steps here.
3. Build the project
Taro JS will compile your React JS code and output a Wechat Mini Program project, so you can run the project in Wechat Developer Tools, and publish it to Tencent in the future.
Two ways to compile the project:
1. Run in development mode
This means every time you make a change to the code, the project will be compiled and the changes will be reflected in the Wechat Developer Tools.
  # In your terminal, run the following command to build the project
  yarn dev:weapp
2. Run in production mode
This means the project will be compiled once, and every time you make a change to the code, you need to run the command again to compile the project. This is useful when you want to publish the project to Tencent, as it compiles the project in a more efficient way.
# In your terminal, run the following command to build the project
yarn build:weapp
Run the project in Wechat Developer Tools
1. Download Wechat Developer Tools
Turbine code template is intended for Wechat Mini Program, so you need to open the Wechat Developer Tools to run the project.
You can download the latest stable version of Wechat Developer Tools here.
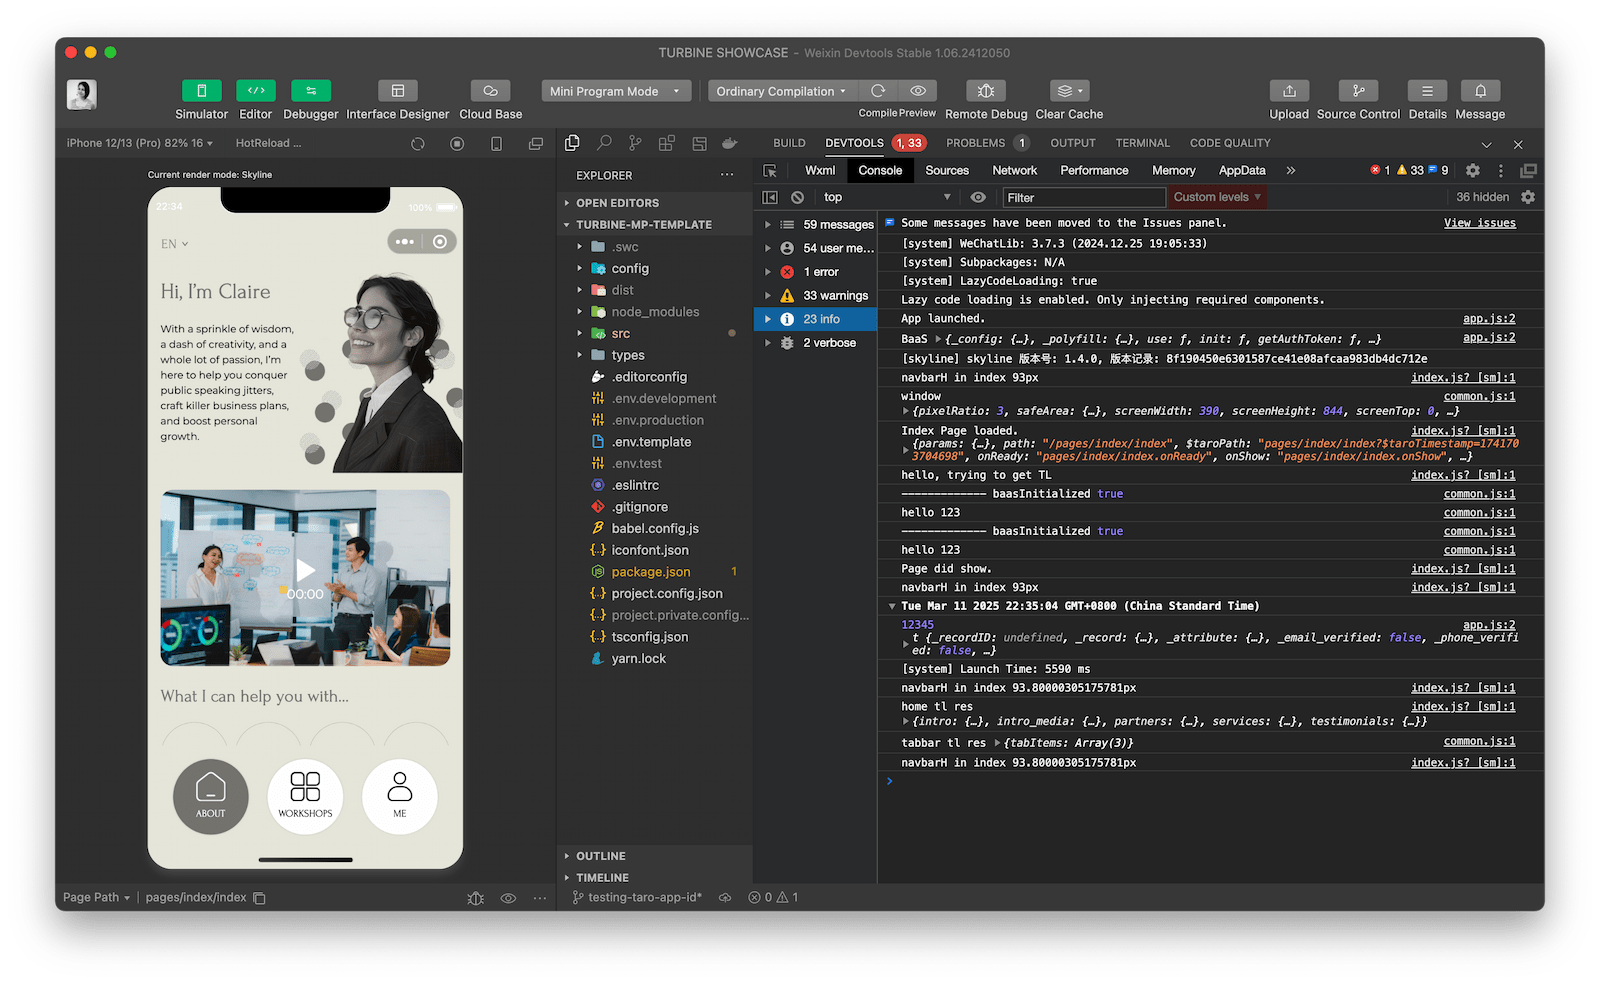
2. Open the project in Wechat Developer Tools
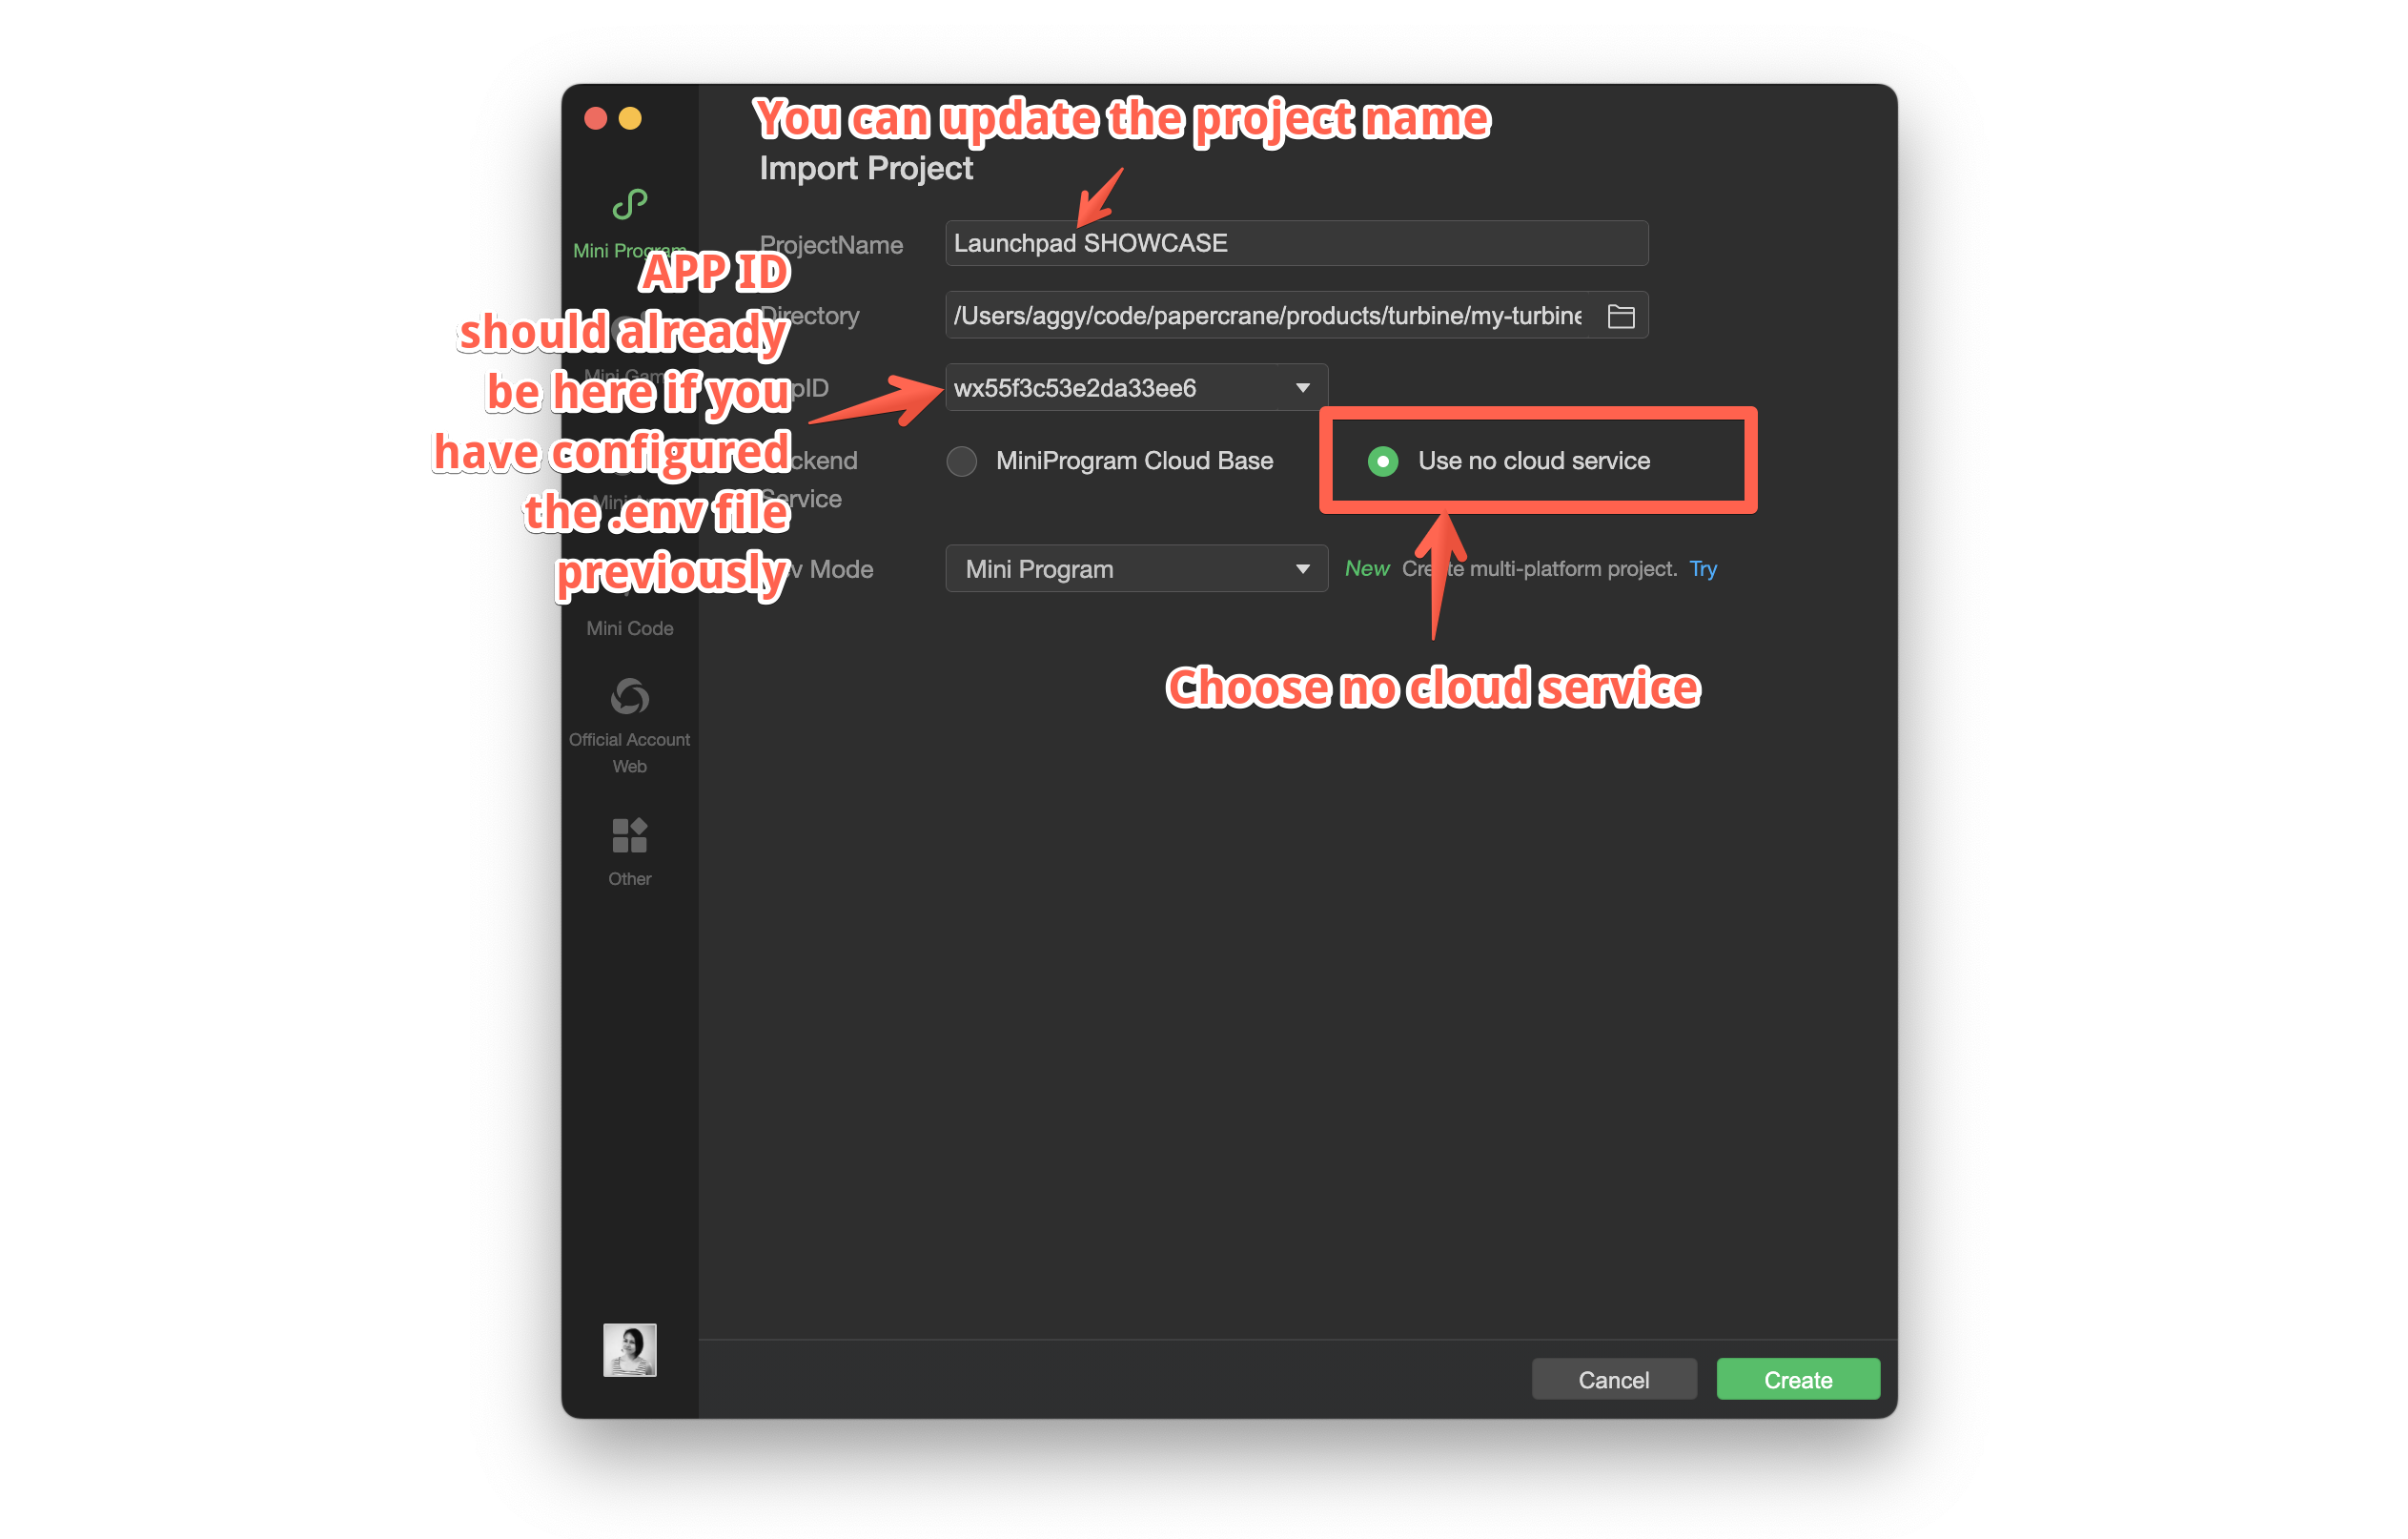
Import the project in Wechat Developer Tools by going to Project > Import Project on the top menu bar. This window will prompt you to select the path of the project.
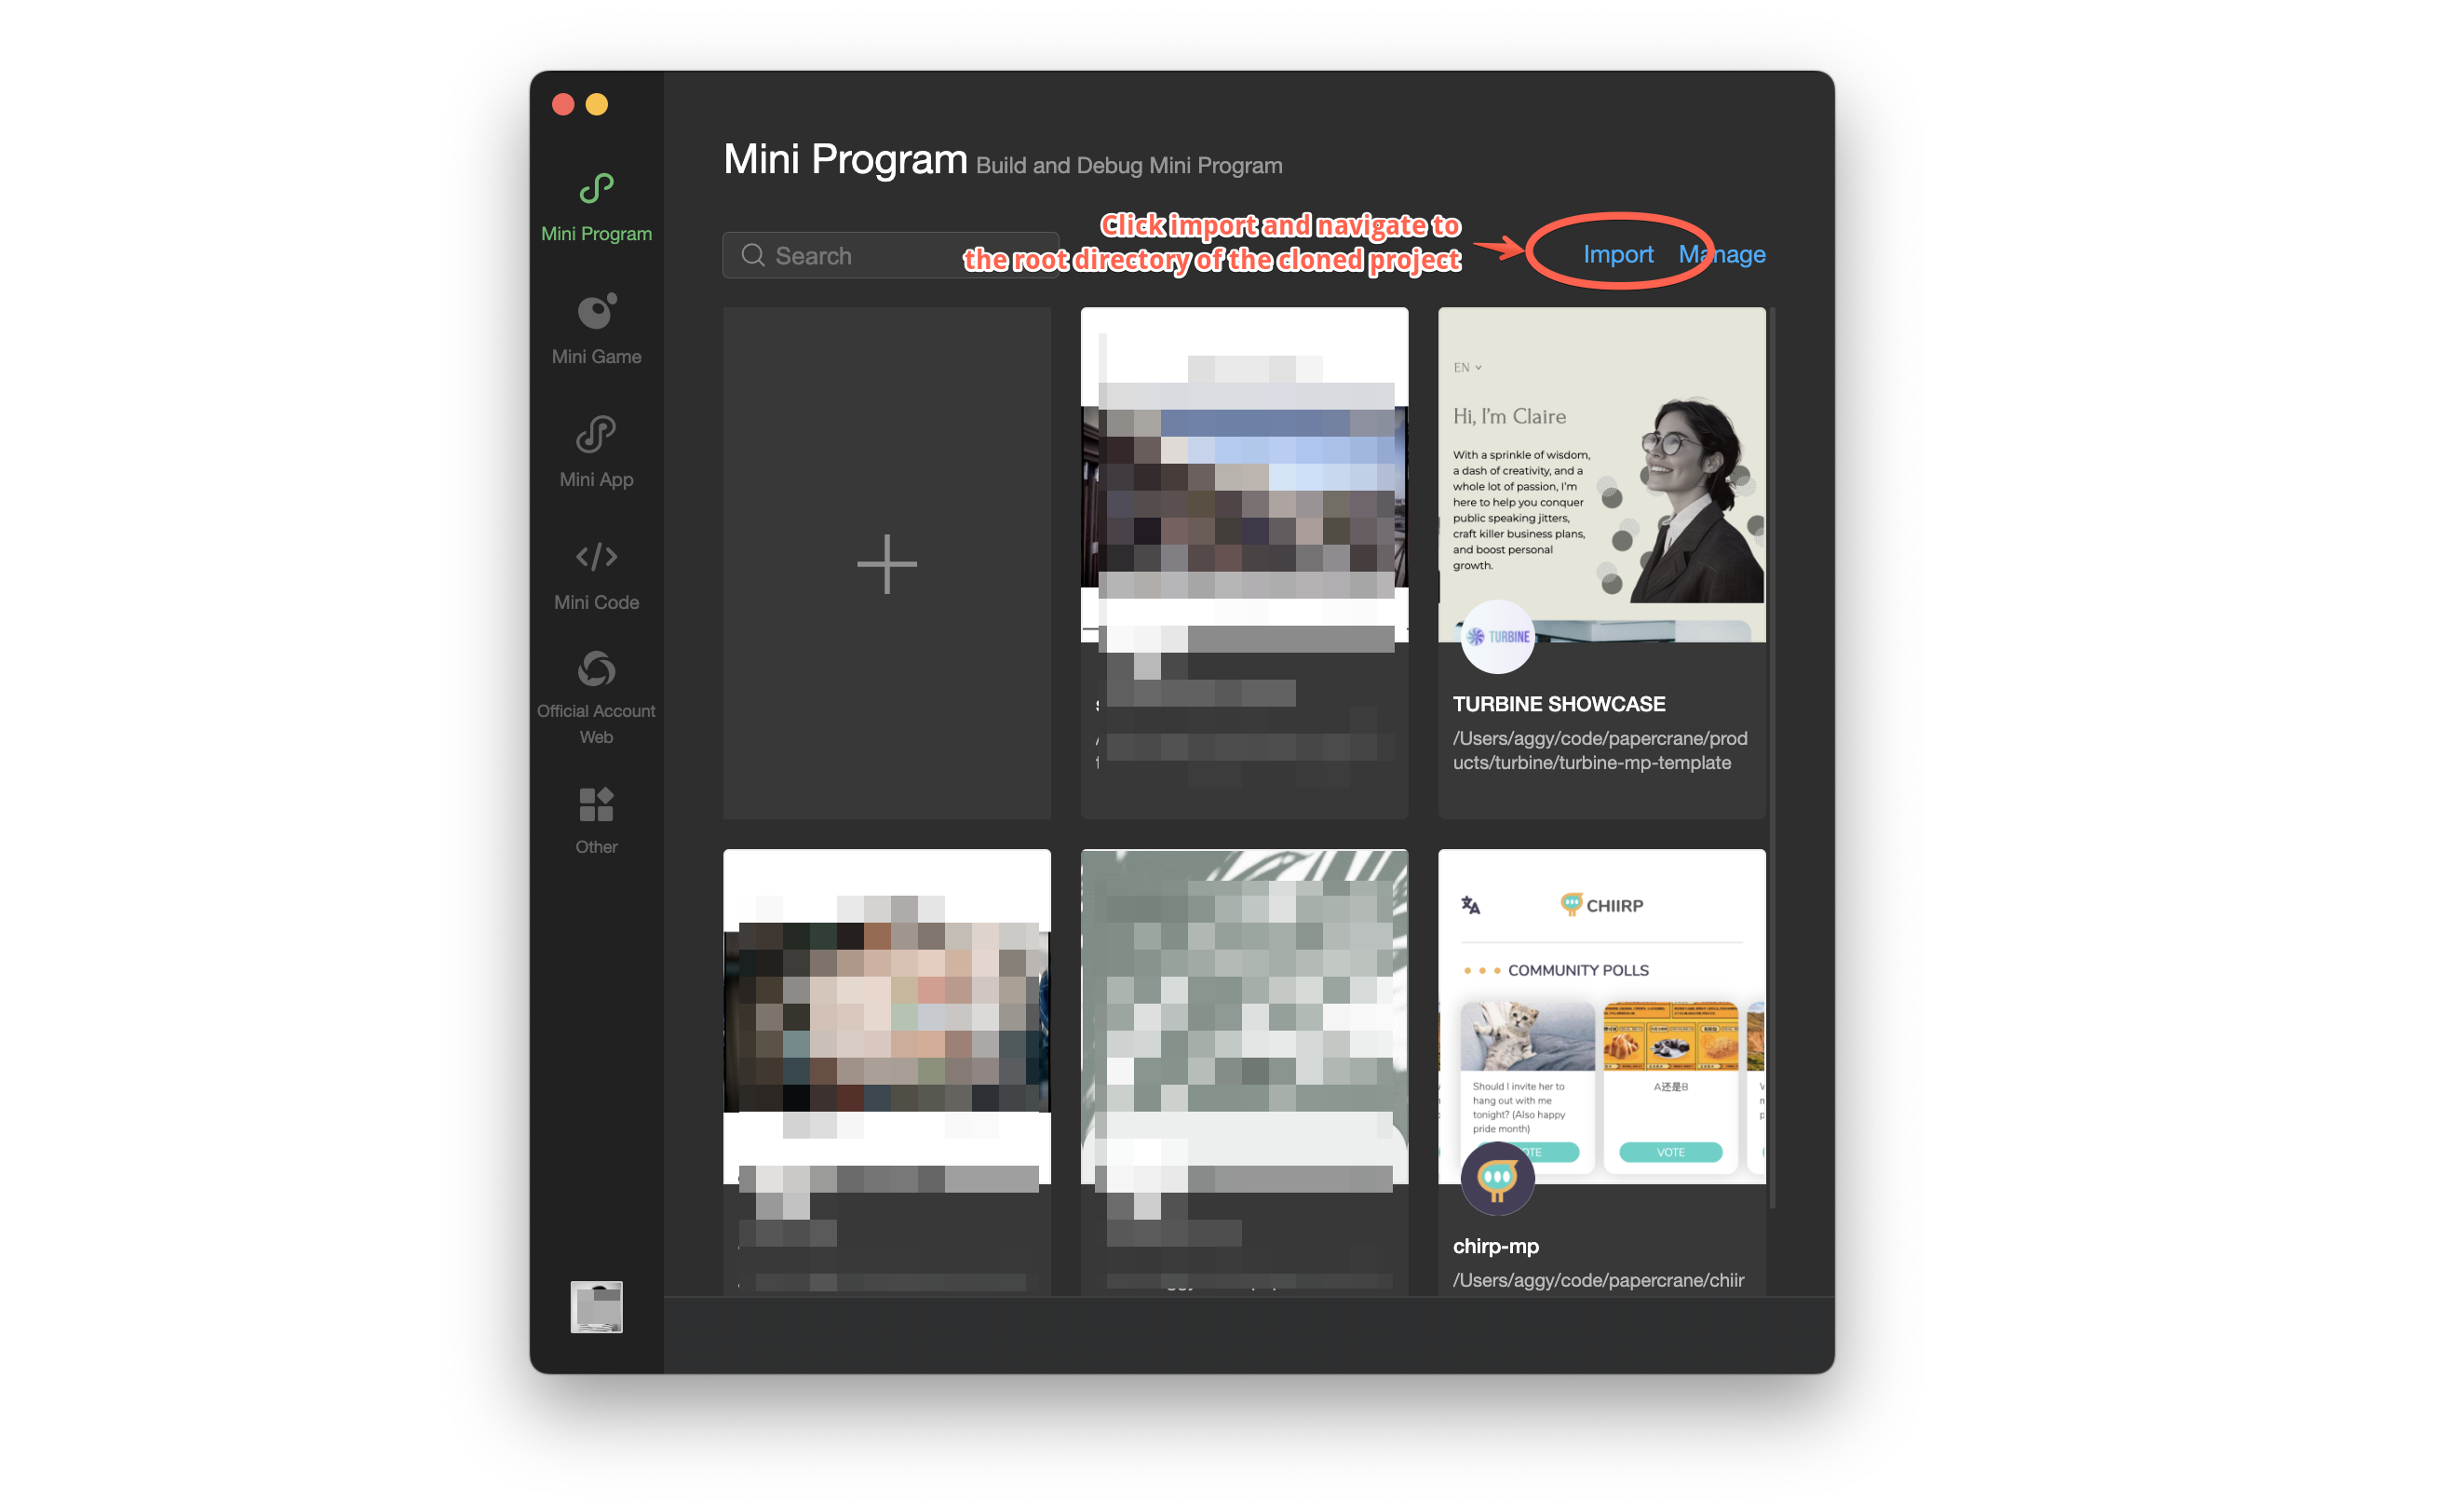
Select the path of the project, choose "Use no cloud service" and click Create to open the project in Wechat Developer Tools.
Voila! You should now see the project in Wechat Developer Tools.